I believe plain homemade yogurt is much tastier than any store-bought variety. Also, it doesn’t only have a better flavor but it’s also much cheaper! By controlling its fermentation, we can decide its final texture and acidity, giving us the possibility to prepare it just as everyone likes it the most.

Unlike kefir that requires kefir grains, making yogurt doesn’t call for anything rare, you only need 2 ingredients: milk and some good quality yogurt containing good probiotics.
TWO THINGS YOU MUST KEEP IN MIND WHEN MAKING HOMEMADE PLAIN YOGURT:
- 1. The better the milk quality, the better the yogurt will be. Use whole milk to get a creamy yogurt and ideally purchase it directly from a producer
- The yogurt starter —your next batch will only need a little of what you’ve prepared— should only contain milk and live cultures in its ingredient list, nothing else, preferably organic. Why? Here’s an article I wrote about why to choose organic and local products.
WHAT EQUIPMENT DO YOU NEED TO PREPARE HOMEMADE PLAIN YOGURT
- A 2-liter or larger capacity pot
- A food thermometer (you can still make yogurt even if you don’t have one, but I recommend getting one even if it’s not required)
- A 2-liter capacity cooler or thermos (optional)
- A cloth or towel large enough to cover the pot
- Cheesecloth (optional)
- A strainer (optional)
Video
PrintHOW TO MAKE HOMEMADE PLAIN YOGURT IN 5 SIMPLE STEPS

- Prep Time: 30
- Cook Time: 8 hours
- Total Time: 8 hours 30 minutes
- Yield: 1
- Category: fermnets
- Method: ferment
- Cuisine: ferment
Ingredients
- 2 liters whole milk
- 2 tablespoons plain yogurt (unsweetened)
Instructions
- Heat the milk until it reaches 80 °C making sure it doesn’t go above 90 °C. Once it reaches the right temperature remove from heat. If you don’t have a thermometer you just have to look closely at the milk and as soon as you notice the first bubbles on the edge of the pot, remove from heat.
- Let it cool down to 45 °C. (You can put the pot in an inverted water bath, that is, in ice water, and mix to help it cool faster). Again, if you don’t have a thermometer, once the mixture is lukewarm (similar to a bath temperature), then it’s ready.
- Add two tablespoons of yogurt to a cup of lukewarm milk and stir well until the yogurt is well dissolved. Then put it back into the milk mixture.
- Wrap the pot in kitchen towels or cloth and place it inside the cooler or oven (to keep its warm temperature for as long as possible), for at least 8 hours or up to 24 hours. Once 8 to 12 hours have passed, refrigerate it for at least 2 hours to give it a thicker texture.
- (Optional step) Upon completing the previous steps, if you want the yogurt to have a thicker consistency, you can strain it. To do this place a strainer over a bowl and cover the strainer with a cheesecloth. Pour the yogurt on top of the cloth and let it drain (the yogurt and whey will separate) until it has the texture of your choice. To make a Greek type yogurt you must wait at least 4 hours. The final texture will depend on your personal preference, but if you leave it for too long it will resemble the texture of cream cheese, more than anything else.
Notes
The longer you leave the yogurt to ferment, the more acidic it will become. For my family, between 8 and 12 hours is the ideal time, if I leave it any longer my daughters don’t like it because it’s too acidic for their taste.
Keywords: ferment, home made yogurt
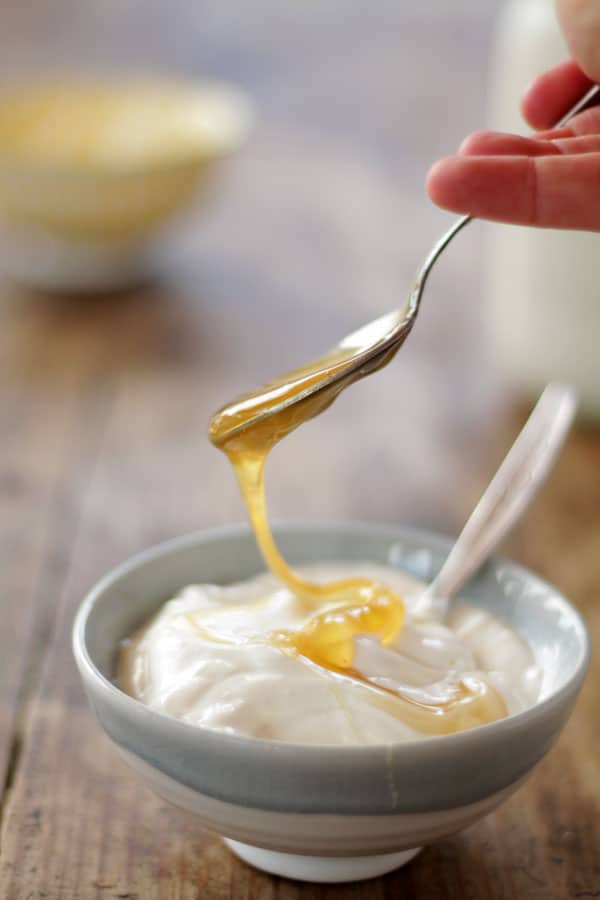
Once the yogurt is ready, all you have to do is enjoy! You can eat it with homemade granola such as this one; you can add it to this mixture to make flatbread to give it a spectacular texture; you can use it with this hummus recipe to make it super creamy, or you can put it into this salad dressing. In any case, now you have an additional extra delicious ingredient, just don’t forget to save a couple of tablespoons to make your next batch.
FREQUENTLY ASKED QUESTIONS
Why didn’t my yogurt turn out?
There are two possible reasons. The first one is that when adding the yogurt to the milk, it was too hot. As a result, the bacteria that produce the yogurt probably died from the high heat.
The second possibility is that you were unable to keep the 45 °C temperature long enough.
I don’t have a cooler, is there an alternative?
- You can pour the yogurt into a thermos.
- You can cover the pot well with a cloth and put it in the oven with the inner light on.
- You can put it in a high place within the kitchen; heat tends to rise and it’s usually warmer in the higher places of the kitchen.
I don’t want to strain the yogurt
This step isn’t necessary, but by straining it you achieve a texture closer to that of a Greek yogurt. However, it’s not compulsory.